Raspberry PI First Time Setup

The Raspberry Pi is a nice awesome little computer – however unlike normal pcs it doesn’t come preloaded by having an operating-system (OS). Which means that to be able to make use of the Raspberry Pi computer you have to use a OS of your liking onto a Sdcard and employ that as well the pc.
This information will demonstrate how you can use a operating-system, expensive it to some Sdcard and boot your Raspberry Pi the very first time.
If you wish to stick to the article in your own home you’ll want:
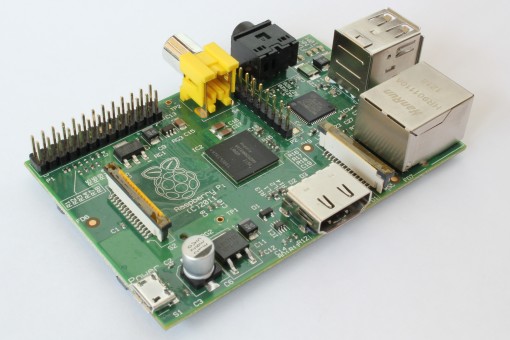
A Raspberry Pi – Model B
A Sdcard (min. 2 GB)
A pc with a web connection along with a Sdcard readers
A USB keyboard
A High-definition multimedia interface monitor
Choosing a Operating-system (OS)
A Raspberry Pi doesn’t run standard operating-system for example Home windows 8 or OS X. It is because the Raspberry Pi is run by a so-known as ARM processor, this kind of computer processor cannot execute exactly the same programs as the computer. Rather it has to run among the os’s which have been enhanced and ported towards the Raspbery Pi ARM hardware architecture.
Fortunately you will find a number of different os’s available. You should observe that many of them derive from the linux kernel.
Soft-float Debian “wheezy”
The soft-float debian operating-system can be used mainly if you’re running intensive java based programs in your Raspberry Pi (We will not be doing that for the time being).
Arch Linux ARM
This operating-system isn’t for novices therefore we wont talk much more about it simply now. It is important to take particular notice only at that if you’re already a skilled Linux user.
Raspbian “Wheezy”
The Raspbian “Wheezy” operating-system is easily the most popular operating-system to operate around the Raspberry Pi. It’s excellent integration using the hardware and comes pre-packed with a graphical interface and development tools. This will be very handy if you’re not too familiar with a linux atmosphere.
With regards to this short article we’ll make use of the Raspbian operating-system since you can easily get began with. Initial step is download the most recent form of the Raspbian “Wheezy” operating-system image. It’s freely available here (scroll lower to “Raw Images”).
After you have downloaded and slowly move the file for an appropriate folder right click and choose “Extract All… ” – this can extract the look file in the downloaded zip file.
Other Tools
Additionally towards the operating-system we’re also have to a course that may transfer the operating-system to the Sdcard in a way the Raspberry Pi may use it as well from. The program is known as Win32DiskImager and it is available for free.
Beginning Win32DiskImager
After you have downloaded the Win32DiskImager file – move it for an appropriate folder, right-click and choose “Extract All… ” stick to the help guide to extract this program.
This program doesn’t need to be installed – you can begin it now by double clicking the file “Win32DiskImager”. Before beginning plug the empty Sdcard to your computer.
Once began you’ll have to choose the Rasbian “Wheezy” image file, next choose the drive letter of the Sdcard.
NOTE: Its essential that you are 100% certain the drive letter selected is the Sdcard.
Now press “Write” and relax and relax as the program installs the operating-system on your Sdcard. While waiting you are able to connect the Raspberry Pi to some USB Keyboard & Mouse along with a High-definition multimedia interface monitor or TV.
First boot
After we have designed the Sdcard – plug it in to the Raspberry Pi. At this time everything however the energy supply ought to be blocked in to the Raspberry Pi.
First Boot Configuration
Connect energy and you ought to begin to see the boot sequence in your TV (otherwise see if you chose correct High-definition multimedia interface input on television). After first boot the Raspberry Pi boots in setup mode. If it doesn’t boot into setup mode you are able to type the next command to obtain there:
sudo raspi-config
Much more setup mode you want to:
Re-size to file for-system to make use of the whole Sdcard within my situation (4GB) (First option in setup menu)
Alter the locale to fit your location (This really is found under “Internationalization Options”)
Alter the timezone to fit your location (This really is found under “Internationalization Options”)
We are able to now reboot the raspberry so when it boots again it’ll develop our new configuration! To log being used the next qualifications:
User: pi
Password: raspberry
Your Raspberry has become setup, set up and prepared to work with for just about any purpose you would like.
If you want inspiration or assistance to get began together with your Raspberry Pi project you will find lots of Raspberry Pi Projects and guides on RaspberryPiHQ.com.
For additional projects and guides for that Raspberry Pi visit RaspberryPiHQ.com.